As a fun way to get psyched up for a WDW vacation, here's a tutorial for some Disney nails.

First start off by gathering/purchasing all the colors you will need.
I used yellow, red, black, and white (Mickey Mouse colors). I actually do not own white nail polish, so I used white acrylic paint and it worked fine!
Then paint each nail as shown below and let them dry completely.

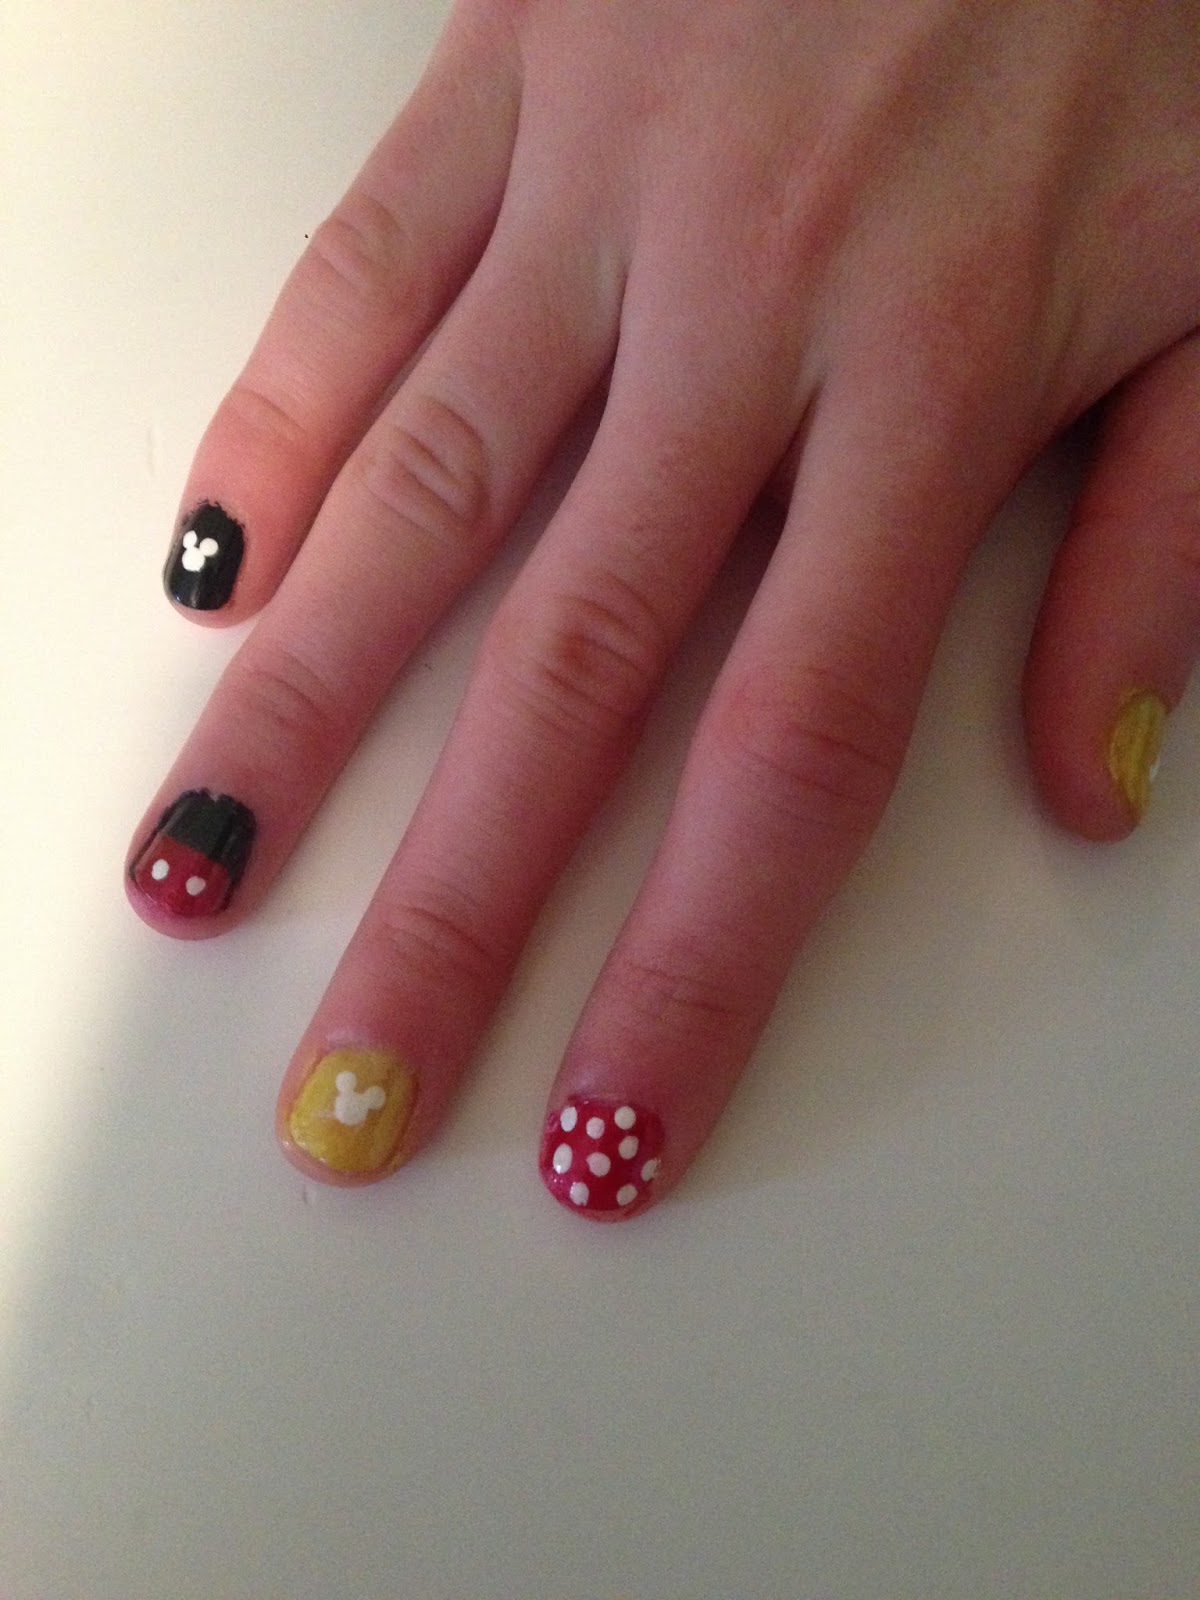
Using the back of a small paint brush, paint 6+ dots on the two red nails.
Then paint three dots in the shape of a Mickey head on the black pinky nails and yellow nails.
Paint a red stripe on the bottom half of the remaining black nails. Add two dots to each of these nails.
Finish with a clear top coat to seal.
Finish with a clear top coat to seal.
 Terrible lighting, but this Mickey bracelet is for sale on my Etsy shop!
Now go show off your cool Disney manicure!
:)
Love the nails. Think it works on toes as well? It would look great when wearing flip flops!
ReplyDeleteNorma Hugenschmidt